The honest answer up front. A cold sore can be partially covered with makeup, but only at certain stages, and the result will never look like clean lip skin. The realistic goal is to make the lesion non-obvious from 1.5 metres away under normal lighting, not invisible in a close-up selfie. The vesicle and weeping stages (days 1 to 3) cannot be covered without making the lesion significantly worse. The crust stage (days 3 to 5) covers reasonably well with the right sequence. The healed pink-mark stage (days 5 to 10) covers almost perfectly with a single layer of concealer. This post is the realistic 5-step sequence calibrated to each stage, plus the lipstick question almost everyone asks separately.
The stage-by-stage cover-ability map
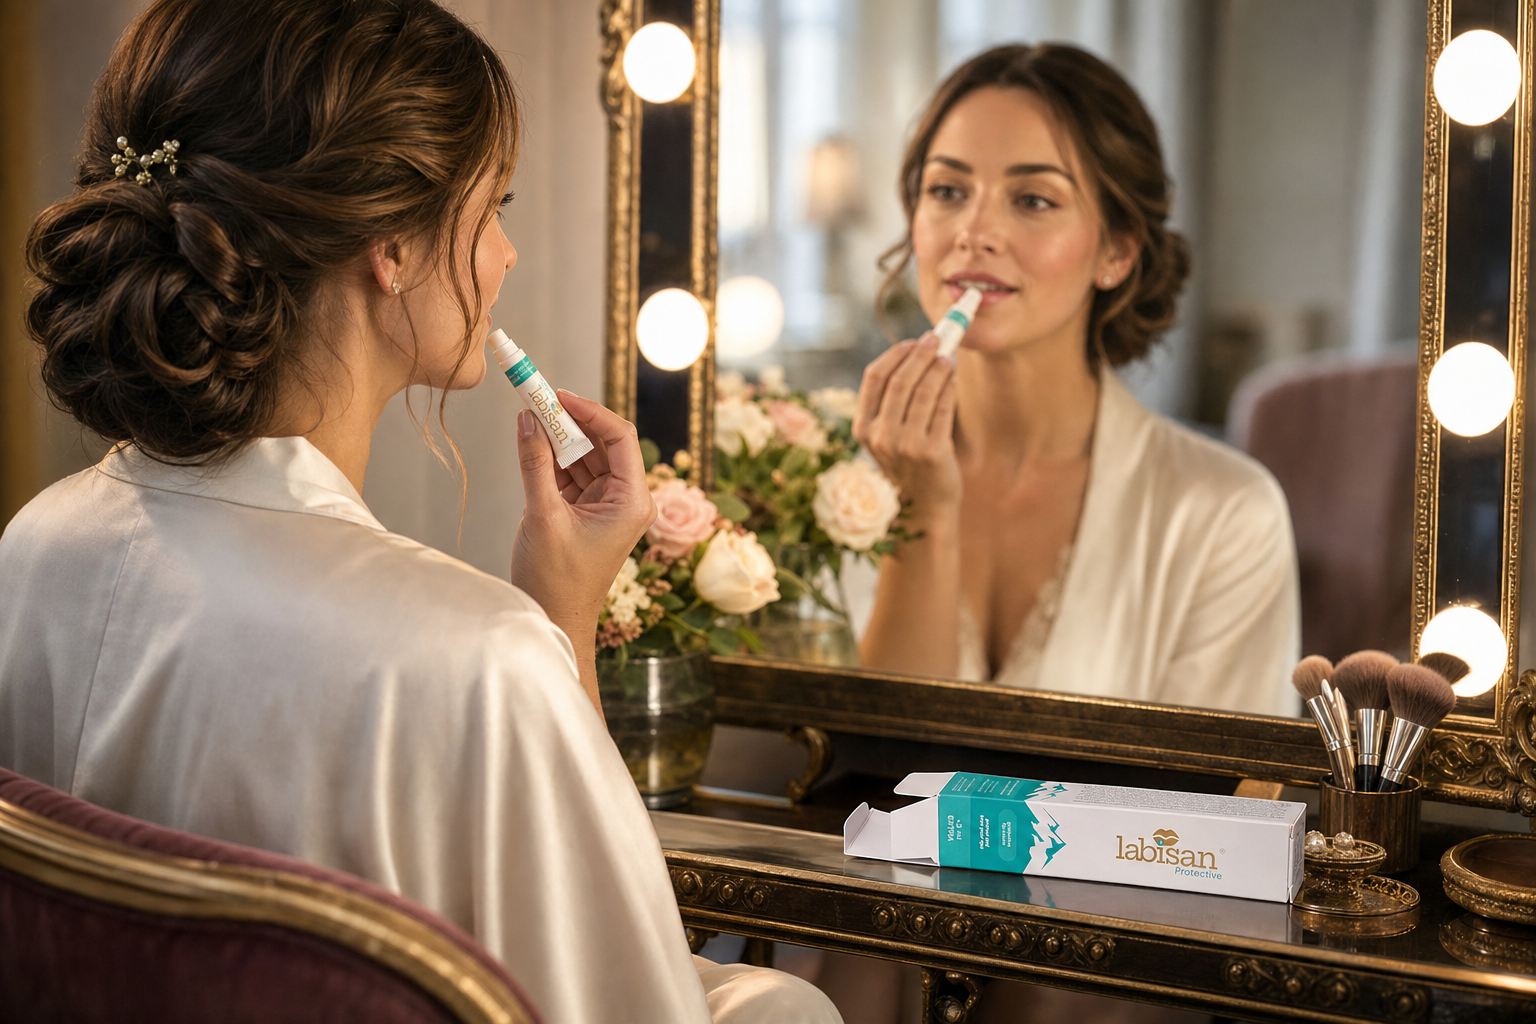
Stage 1 — tingle, no visible lesion (hours 0 to 24). Nothing to cover. Apply the Labisan topical and proceed with your normal lip routine. If you are on the protocol from the first tingle, the visible lesion may never appear and the question becomes moot. This is the easiest stage in every dimension.
Stage 2 — vesicle, fluid blister (hours 24 to 72). Do not attempt to cover this stage with foundation or concealer. The fluid blister is fragile, the makeup will not sit on it, the seal will break and weep, and you will spread infectious material across the entire lower face. The only acceptable cover at this stage is a hydrocolloid pimple patch (specifically formulated for cold sores) which seals the lesion mechanically and then can be lightly powder-set around the edges. Compeed Invisible patches are the most widely available option. Apply the Labisan topical first to give the patch something to seal against, then place the patch.
Stage 3 — early crust (hours 72 to 96). Now coverable. The crust is solid, will not weep, will not migrate. This is the stage at which the 5-step sequence below works well.
Stage 4 — mature crust shedding (hours 96 to 120). Still coverable but more difficult because the crust edges are lifting and any pressure or product application can shed the scab prematurely. Approach lightly; do not press or rub.
Stage 5 — healed pink mark (day 5 onward). Single layer of concealer matches surrounding skin tone. Almost invisible.
The 5-step sequence for the crust stage (the hardest case)
This sequence assumes you are at hours 72 to 120 with a visible crust on or near the vermilion border and you have a real-world event in 2 to 6 hours that requires the lesion to look non-obvious.
Step 1 — Apply Labisan Protective Lip Balm to the entire lip and 5 mm of surrounding skin (60 seconds before the rest of the sequence).
This serves two purposes. It provides the antiviral and SPF coverage you would apply anyway during an active outbreak. And the zinc oxide creates a slight matte base that the rest of the sequence sits on better than bare crust. Let it absorb for 60 to 90 seconds before applying anything else. Do not blot. Do not powder-press it.
Step 2 — A single small dot of color-correcting concealer (peach or salmon tone for fair skin, orange for medium, deep orange for dark) directly on and around the crust.
The crust will be slightly redder than surrounding skin even after the lesion is fully healed. The color-corrector neutralises the red BEFORE you put any skin-tone product on top. Apply with a small clean brush or your clean ring finger; do not double-dip into the corrector. Use 1/4 of the amount you think you need. More is worse.
Step 3 — Skin-tone concealer over the corrected area, blended outward 2 to 3 mm onto surrounding healthy skin.
Match your normal foundation shade. A liquid or cream concealer works; powder concealer will sit on the crust unevenly. Tap the concealer in with the ring finger or a clean small brush. Do not rub or wipe. The motion is press-and-lift, not slide.
Step 4 — A whisper of translucent loose powder to set, but NOT on the crust itself.
This is the critical detail most tutorials get wrong. Powder sets the concealer on the healthy skin around the crust so it does not migrate. Pressed onto the crust itself, powder makes the crust look obviously dry, cracked, and emphasised. Use the lightest dusting only on the surrounding skin, leaving the centre crust untouched.
Step 5 — Touch up at the 2-hour mark with the Labisan topical (gently, around the makeup) and a single dab of concealer if needed.
The full sequence holds for about 2 to 3 hours under normal indoor conditions. Touch up halfway through a long event. Do not re-do the full sequence; just refresh the spots where the corrector or concealer has migrated.
The lipstick question, separately
Three layers to this question.
Can you wear lipstick at all during an active outbreak? Yes, with caveats. A single-use disposable lipstick (small sample tube, drugstore travel-size, or a lipstick you are willing to dedicate as the "outbreak lipstick" and not return to general rotation) is the only safe approach. The lesion is contagious during the vesicle and early crust stages. Lipstick that has touched an active lesion carries infectious viral particles for days afterward. Returning that lipstick to your general rotation risks re-introducing the virus to the lip site at a later application.
Can you wear lipstick over the makeup sequence above? Yes, but use a creamy or satin formula not a matte or long-wear formula. Matte and long-wear lipsticks have higher pigment loads that emphasise rather than hide texture. The crust will show. A satin or sheer lipstick in a neutral shade close to your natural lip color is the highest-cover option, paradoxically. The lipstick distracts from the lesion site by drawing the eye across the whole lip rather than to the specific spot.
What lipstick colors work best? Mid-tone pinks, mauves, soft reds, and neutral nudes. Avoid: bright fire-red, dark vampy plum, glossy clear (gloss emphasises the wet appearance of any weeping), and any matte formula.
What not to do, ever
- Do not apply makeup directly to a vesicle or weeping stage. Wait for crust formation.
- Do not use a makeup wipe to remove makeup from over a cold sore. The rubbing motion shreds the crust and re-opens the lesion. Use a non-rubbing cleansing balm or oil cleanser, applied with light pressure, then rinsed off.
- Do not share lipstick, lip gloss, lip liner, or any product that has touched the cold sore site with anyone else, including yourself in non-affected periods. Designate that product as outbreak-only.
- Do not press loose powder directly into the crust. Powder on a crust looks worse than no makeup at all.
- Do not pop, pick, or peel the crust to "make it easier to cover." This produces a wound, restarts the healing clock, and creates a much harder cosmetic problem.
The wedding-day or photo-day version
Three days before the event, start the active outbreak protocol from the hybrid system overview. Most outbreaks intercepted at the tingle and aggressively dosed across days 1 to 3 reach the crust stage (coverable) by event day, rather than the vesicle stage (uncoverable). The combination of the dual protocol plus the 5-step makeup sequence on event day means the lesion is non-obvious in photos taken at conversation distance and visible only in close-up macro shots.
The photographer-aware version: ask the photographer to favour angles that keep the affected lip-side slightly away from the lens, and to use diffused soft lighting rather than direct flash. Cold sores show most in flat hard light and least in soft directional light. A wedding photographer asked discreetly will quietly adjust angle without comment.
The non-event recommendation
If you have an active cold sore and no urgent reason to look perfect in close-up, skip the makeup. Apply the Labisan topical normally. Let the lesion heal in 5 days rather than disturbing it with concealer for a 2-day social calendar that does not warrant it. Most adults around you will not notice a small lesion at conversation distance, and the few who do will have had one themselves. The cost-benefit of full cover-up is only worth it for genuine high-stakes visual moments.
Both Labisan products are available individually and as a bundle on labisan.shop. The bundle is sized for one active outbreak plus 3 weeks of prevention, which covers the typical wedding-prep timeline from "I might be getting one" to "the day is over."